1. Make sure you select a good photographic reference
What makes an effective photograph? Firstly, make sure it is large enough to allow you to view details. Do not select blurry photos. Secondly, make sure the photo is not over or underexposed and has a good balance of light and
dark areas. I recommend selecting a photo that has only one visible light source hitting the subject so that you can easily distinguish where the lightest parts and darkest parts will be.
 rr
rrTry going for a simple object first. Perhaps a simple still life photograph with only one or two objects in it?
Start out with something like this.
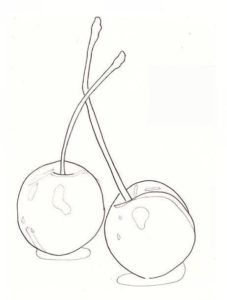
2. Create a light pencil sketch including only outlines of shapes
Practice your observational/drawing skills to create a simple, outline drawing of your subject. Focus only on the general shapes, proportions and locations of the subject(s) in relation with one another and within the
composition.

Outline drawing of cherries created using the previously mentioned reference picture.
3. Take a moment to observe the reference picture and answer the following questions:
- -Where is the light source located in relation to my object(s)? Is the light in front, behind, below, above or to the side of the subject?
- -Where are the lightest/whitest parts of the subject?
- -Where are the darkest/blackest parts of the subject?
- -If there are different colors included in the photograph (in this case we have red and green), how do they relate to one another in terms of their value? Is the red included here LIGHTER or DARKER than the green?
This is very important! It may be easy to notice different values within the same color, but once more colors are added in, it is important to notice how they compare to one another in terms of lightness or darkness. For
example, in this picture, the values of reds in the cherries are darker (for the most part) than the green in the stems. The green in the stems is pretty light when compared to the reds of the cherries and this is something that
has to be translated within a one-color drawing.
If you still feel unsure, I recommend you take your time when preparing your initial sketch. Create a map for yourself using LIGHT pencil strokes within your outline drawing. I do something similar when painting with watercolors
in order to remind me what areas will be left completely white and which areas are darkest.

In this “map” I have created shapes that should be left nearly white and also where my cast shadows will be below the cherries.
4. Start developing those values!
I recommend starting your drawings with a pencil if you haven’t practiced these techniques much and moving on to pen and ink once you feel more confident. Pen and ink drawings are wonderful and super fun but each and every line you
create is permanent and it is easy to get discouraged if your drawing doesn’t turn out the way you want it to. Experiment with different techniques and go for the one you feel comes most naturally to you.
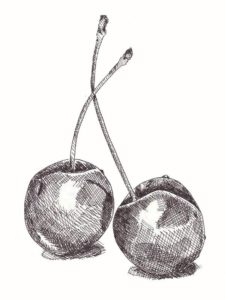
You can move on to exploring combinations of techniques and more complex subjects as time goes by. The way I usually start this type of drawing is by placing my hatching in the darkest areas and going back and forth adjusting values as
I see fit.
5. Consistency is key
It is essential to keep in mind that the lines you are creating are meant to ENHANCE and not DISTRACT the viewer when the piece is finished. So, again, remember that line length, thickness, and direction should show some kind of
consistency. Take your time! These kinds of drawings are very much a mental exercise as much as they are a drawing exercise.


